Control freak

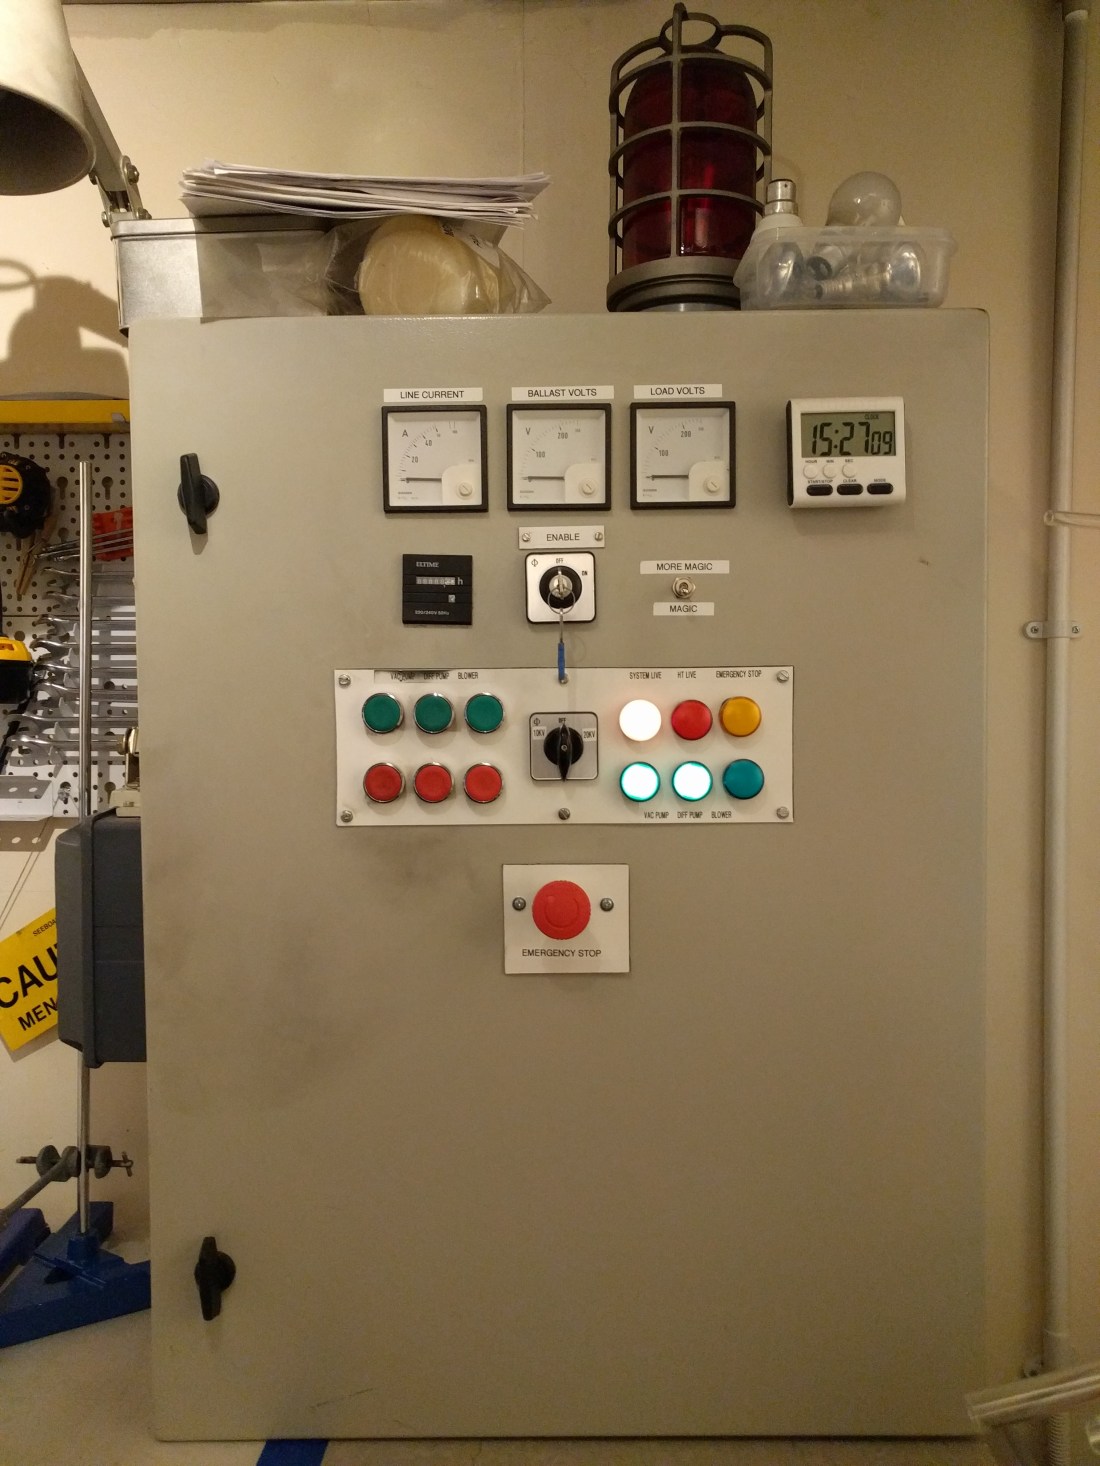
Welcome back to part two of this series on control systems for neon workshops (and apologies for the slightly longer than planned hiatus over the winter break!).

In this post we’ll look at the details of putting a system together, and the parts and circuit elements involved.

After looking at the requirements and high-level design in Standing in the way of control, we have an idea of what we are trying to achieve and the requirements for the finished system: now it’s time to choose parts that meet those goals and figure out exactly how to hook them all up together.

front-panel.jpg
Front panel with start/stop buttons, voltage select and status lamps,

Continue reading “Control freak”

Standing in the way of control

A neon workshop contains a number of electrical systems to support the glass work and processing equipment: electricity powers the bombarder, air blowers, mechanical vacuum pump and the heating and cooling equipment for the diffusion pump, as well as a host of minor auxiliary loads such as gauges and the spark tester.

In this article we’ll take a look at some of the components that go into the controller for a neon workshop as well as some of the high-level design and practical considerations involved in putting together a working system. Continue reading “Standing in the way of control”

Let it slide

Right then, welcome back to the third, and hopefully final part of this exciting exploration of the wild world of ballasts for neon bombarding. In this post I’ll go through the final choke build, testing, and installation and take a look at how the finished choke performs in actual use.

If you missed the first two parts you can find them at Ballast to basics and All choked up.

slide-choke1
The completed slide choke installed under the processing bench.

Continue reading “Let it slide”

All Choked Up

OK so welcome back to part two of the series on ballasting for neon bombarding systems. In this post we’ll take a look at the principals of inductive ballasting, and why it is a better bet for neon workshops than the resistive techniques we looked at in the last article.

If you missed part one you can read it at Ballast to basics.

choke-spitting-core1
This is not a test. It’s a drill. Wait, no, that’s a drill. What was I talking about again?

Continue reading “All Choked Up”

Ballast to basics

After getting hold of a usable bombarding transformer the next step was to try to buy or build the necessary controls to allow it to be used to successfully process tubing. In this post I’ll discuss some of the theoretical background involved in designing high power ballasts: next time I’ll go through the design, prototyping and build of the choke to control my bombarder.

The electrical controls for a neon bombarder are actually quite simple: one or more on / off switches to control the low voltage supply to the transformer and a current limiting device to allow the current to be varied over a range of levels. Ideally the current control should allow the current to be adjusted smoothly over a wide range: from one hundred milliamps or less to currents exceeding one amp.

bombarding-controls1
Bombarding control cabinet (we’ll get to this in a future article).

Continue reading “Ballast to basics”

Bringing home the bombarder

Working together the vacuum pumps, manifold, and bombarder form the basic requirements for processing neon lighting. The pumps and manifold allow units to be cleaned (heating) and then emptied of impurities (evacuation), before a small quantity of one or more rare gasses is added at a controlled pressure (filling).

The bombarder comprises all the electrical equipment needed to provide the high voltage, high current power required for the heating and cleaning process inside the unit.

bombarder1
The bombarding transformer sitting in the garage awaiting installation.

Continue reading “Bringing home the bombarder”

Welcome to the jumble: we’ve got fun and flames

OK, welcome back and thank you for sticking with me past the first post! Before I jump into all the technical details, plans, sketches and so on, I wanted to post a quick overview or recap of what I’ve been doing over the last year or so since the project kicked off. Take this as a brief tour or status update: I’ll go through things roughly in order as you walk into the shop.

IMG_20171116_152046.jpg Continue reading “Welcome to the jumble: we’ve got fun and flames”